Rendering 3D Objects
Electric UI contains a fully-fledged 3D engine, backed by ThreeJS and react-three-fiber.
Scenes can be built declaratively using familiar JSX syntax.
File Format Basics
The recommended file format is the binary version of GLTF 2.0, with the .glb file extension.
Background Info
The glTF file format is a Khronos specification released in 2017. Khronos are an industry consortium responsible for (notably) OpenGL, Vulkan, and other computer graphics standards.
glTF files are vendor neutral, royalty-free, and intended for presentation of interactive data for end-user applications and use on mobile devices.
Files can include multiple models, principled PBR material models, animation/rigging data and more. This allows creation and handling of entire scenes in a modern, industry standard format.
Preparing model files
Due to the increasing popularity of web based file sharing, VR experiences and 'industry 4.0' developments, glTF has native support with some mainstream CAD vendors.
For other packages such as Creo, Catia or NX, files might need to pass through an external converter until native export support becomes available.
In our experience most engineering-grade CAD packages export with simpler functionality comparable to STEP (AP214) exports.
Direct exports might not be advisable for large/complex models due to high polygon count.
In these situations, running the model(s) through a 3D modelling tool such as Blender, Maya or 3DSMax to simplify geometry and decimate as required.
Alternatively, the free MeshOptimizer gltfpack tool can be used to reduce model complexity.
Solidworks
Solidworks Extended Reality export functionality allows for direct export of models.
When multiple parts need to move individually, we recommend exporting these as separate files for easier handling in the UI.
Autodesk Inventor
While we don't have personal experience with these tools, there are a few exporter options:
- ProtoTechs GLFT Exporter
- Extended Reality Export
Keyshot
A litle less conventional, but the Keyshot rendering software can import most native CAD formats.
Once imported, setup materials as desired, and then navigate to File -> Export -> gltf to export the geometry from Keyshot's internal representation.
Blender
Use the glTF-Blender-IO plugin which is pre-installed since 2.80.
Blender plugin documentation here.
FreeCAD
glTF is supported natively after 0.19.23074. Wiki link.
Online Converters
- CAD Exchanger supports GLTF/GLB conversion from most file types.
Building a 3D environment
Import the Environment component and place it in your page, or inside another component.
We'll then load the demo asset with our GLTF.preload() function to ensure the model is ready when it's needed, add some simple transforms and a light.
Within this environment, instead of using normal HTML, tags are Three.JS primitives. Instead of div tags, use a group tag to describe the groupings between components.
group allows for position and rotation control over it's child components and can be nested to build kinematic chains.
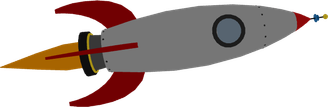
import { Environment , GLTF , OrbitControls } from '@electricui/components-desktop-three'import SpaceShipModel from './spaceship.glb' // Preload the asset as soon as possibleGLTF .preload (SpaceShipModel )function RocketShipViewer () { return ( <Environment > <OrbitControls /> <group rotation ={[0, 0, -Math .PI / 2.15]} position ={[30, 1.75, 0]}> <GLTF asset ={SpaceShipModel } /> </group > <ambientLight intensity ={0.95} /> </Environment > )}GLTFcomponent is used to load the asset.OrbitControlsprovides simple mouse based controls to pan, zoom and rotation around the scene object.groupallows us to apply arotationandpositionwhich affects the child components of the group.- Nesting allows for more complex kinematic chains to be built reasonably easily...
ambientLightcomponent provides a simple fullbright lighting setup.
Connecting to Hardware
The ControlledGroup component provides a group that can be driven from hardware state.
It has accessors available for position, rotation (using Euler angles) and quaternion for quaternion rotation.
Below is an example with a fixed position, and a quaternionAccessor which uses data received on the quat message identifier.
import { Environment , GLTF , OrbitControls , ControlledGroup } from '@electricui/components-desktop-three'import SpaceShipModel from './spaceship.glb' // Preload the asset as soon as possibleGLTF .preload (SpaceShipModel ) function RocketShipViewer () { return ( <Environment > <OrbitControls /> <ControlledGroup position ={[30, 1.75, 0]} quaternionAccessor ={state => { const quat = state .quat // The accessor requires either an array of [x y z w] or a THREE.Quaternion() class instance return [quat .x , quat .y , quat .z , quat .w ] }} > <GLTF asset ={SpaceShipModel } /> </ControlledGroup > <ambientLight intensity ={0.95} /> </Environment > )}Any required assets can be applied within the accessor.
Improving lighting
Lighting options provide better control over the presentation of models or assemblies.

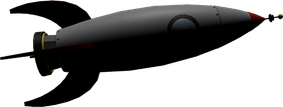
Without light, a silhouette affect appears because the default environment has a transparent skybox.
The most common lightsources are ambientLight, hemisphereLight and directionalLight.
More specific lighting control can be achieved with spotLight, rectAreaLight and pointLight sources.
By default, all light sources target the center of the environment.
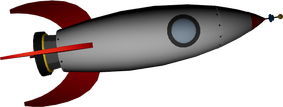
ambientLight allows us to see our model by casting a even value of light over the entire environment. The effect is flat and doesn't cast shadows or show specular highlights.
The colour of the light source can be controlled with the color prop.

<ambientLight intensity={1} color="#0066CC" />A hemisphereLight is a variation on ambientLight which allows control over the colour of the sky and the ground light sources to fake a sense of shadow.
<hemisphereLight intensity={1} groundColor="#CC6600" skyColor="#FFFFFF" />directionalLight provide a positionable 'flat' light source of infinite size, and is cast from a configurable position in the environment.
<directionalLight intensity={0.6} position={[2, 0, 0]} />spotLight provides a cone-shaped lightsource with configurable beamwidth angle in radians (angle), distance falloff (distance and decay), and hardness of edge (penumbra).

<spotLight intensity={2} position={[0, 5, 10]} angle={0.9} distance={50} decay={1.5} penumbra={0.9}/>rectAreaLight creates a rectangular light source of configurable intensity and color. The position and dimensions of the rectangle can be controlled.
<rectAreaLight intensity={5} position={[0, 0, 10]} width={30} height={1} />The example rectAreaLight above is setup as a horizontally wide, vertically short rectangle, positioned between the camera and the model.
pointLight is a lightsource which emits outwards from a configurable position.
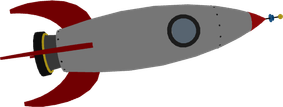
In this example, the point light source colored orange, and positioned behind the rocket model to give the appearance of thruster glow.

<pointLight position={[-15, 0, 0]} intensity={3} color={0xffa500} />Adding the thruster mesh is demonstrated in the example below.
Example
This example rotates the spaceship according to the given quaternion messageID, then scales a flame model at the bottom of the ship based on a thrust message value.
The thrust ControlledGroup is automatically parented to the ControlledGroup that controls rotation.
import { Environment , GLTF , OrbitControls , ControlledGroup } from '@electricui/components-desktop-three'import SpaceShipModel from './spaceship.glb' // Preload the asset as soon as possibleGLTF .preload (SpaceShipModel ) function RocketShipViewer () { return ( <Environment > <OrbitControls /> <ControlledGroup position ={[30, 1.75, 0]} quaternionAccessor ={state => { const quat = state .quat // The accessor requires either an array of [x y z w] or a THREE.Quaternion() class instance return [quat .x , quat .y , quat .z , quat .w ] }} > <GLTF asset ={SpaceShipModel } /> {/* This mesh is our exhaust */} <ControlledGroup scale ={[1.25, 0, 1.25]} scaleAccessor ={state => { const thrust = state .thrust // Scale the thrust float return [1.25, thrust * 10, 1.25] }} position ={[0, 0, 0]} positionAccessor ={state => { const thrust = state .thrust // Place the center of the thrust at the bottom of the ship return [0, -thrust * 10, 0] }} > <mesh rotation ={[0, Math .PI / 2, 0]}> <dodecahedronGeometry attach ="geometry" args ={[1.5, 0]} /> <meshToonMaterial attach ="material" color ="orange" /> </mesh > </ControlledGroup > </ControlledGroup > <ambientLight intensity ={0.95} /> </Environment > )}