Code Signing
Signing your application means that Windows will not warn users about running executables from an "Unknown Publisher".
On macOS, applications which haven't been notarised are considered 'untrusted softare' and will refuse to launch. This would require the user to know how to manually launch the application from the Security preferences override. Signing and notarisation is required for a smooth end-user experience, and (optionally) submission to the App Store.
Windows
You can sign with a normal Microsoft Authenticode Certificate, however this does not build instant trust with the SmartScreen filter (the popup when you launch someone's installer or program).
If you have hardware drivers (for connecting to custom hardware), or you want a level of instant trust from Microsoft, you need an Extended Validation Code Signing Certificate (EV cert).
The EV certificate comes embedded on a secure USB token, and integrates with either some vendor signing software, or Microsoft's signtool software.
Publishing flow looks like this:
- Build production binaries/installers,
- Sign the executable,
- Zip the executable, and upload to your website/server/install media.
Buying an EV Token
Several certificate authorities provide Microsoft certified EV certificates. Microsoft have a page listing some providers and the steps. Most EV certificates cost around $250-600USD/year.
We found that using Microsoft's link to Digicert's EV signing method presented a far lower price, though we don't know how long this will continue to occur.
Based on our experience, the purchase process required information such as company information, our DUNS number, and several confirmations of contact details.
After the authority independantly confirmed this information, they double-checked validity of the order by calling company directors.
The token is then shipped to you with instructions for activating the token and changing the token's password.
Signing an Executable
Token specific interactions may vary by provider, but signing tokens generally use the Windows SmartCard framework/standards, so the signing steps are reasonably generic.
Our certificate provider Digicert, provides their own signing software which allows for manual application signing in a very straightforward manner with a standalone exe file.
- The Microsoft recommended signing approach is to use
signtool.exewhich is included in thewindows-sdkavailable here. You only need to install the "Windows SDK Signing tools for Desktop Apps" section. - You then need to add the
signtool.exelocation to your path to call it from CMD more easily -C:\Program Files(x86)\Windows Kits\10\binis typically the location, though this location may vary by SDK version. - Sign your binary by calling
signtoolfrom the CLI, passing in options for timestamping, certificate types and the executable to sign.
signtool sign /fd sha256 program.exe- A GUI prompt for your token's password will be presented, then the application will be signed.
We recommend cross-signing with the timestamp server of your certificate provider like so,
signtool sign /tr http://timestamp.digicert.com /td sha256 /fd sha256 program.exeYou can validate the signing process by right-clicking on the executable and viewing "Properties" then "Digital Signature". This will show the timestamp, certificate and certificate authority details.
Signing on CI/CD
As the general signing flow requires a manual password entry into a graphical prompt, the signing process is tricky to integrate into a headless, automatic signing process. This is unfortunately by design.
There are some community created tools which try to ease this process - SafeNetTokenSigner is one example, but we found best success with a more manual signtool based method outlined below:
-
Using the SafeNet tool to view the certificate/token details
- Export the certificate as a
.cerand save it somewhere. - View the certificate details (advanced or detailed view mode) and extract the "Container Name" which is a hex formatted string.
- Find and save the "Reader Name"
- Export the certificate as a
-
Store your token's password and the container name as secure/private strings in your CI/CD system so they don't leak.
-
Sign the application and manually provide the
.cer, and password/container name, following our internalarc.exesigning command as example. -
signtool sign /tr http://timestamp.digicert.com /td sha256 /fd sha256 /f C:\electricui.cer /csp "eToken Base Cryptographic Provider" /kc [{{%EV_PASSWORD%}}]=%EV_CONTAINER_NAME% /n "Electric UI Pty Ltd" arc.exe
-
No prompt should be required, and the executable will sign. Signtool will output a message:
Done Adding Additional StoreSuccessfully signed: arc.exe
For our build system, GoCD, the password and container name are exported as environment variables, and
%ENV_VAR%is the normal Windows syntax to handle this.If you embed these strings into a build script or use some other method, the
%aren't required.
macOS
Applications running on macOS require signing and notarisation (in that order) in order to run normally on user's computers.
Without this step, users are shown a scary message about malicious software, and would need to open up their Security preferences and allow the untrusted application manually.
This is mandatory as of 10.15 (Catalina).
Prerequisites
- A machine running macOS, ideally with XCode installed.
- An Apple Developer account,
- An app-specific AppleID password to access your account,
- The Developer Identity Certificate for your Apple Developer account
- From the Apple Developer account landing page, click "Certificates, Identifiers & Profiles"
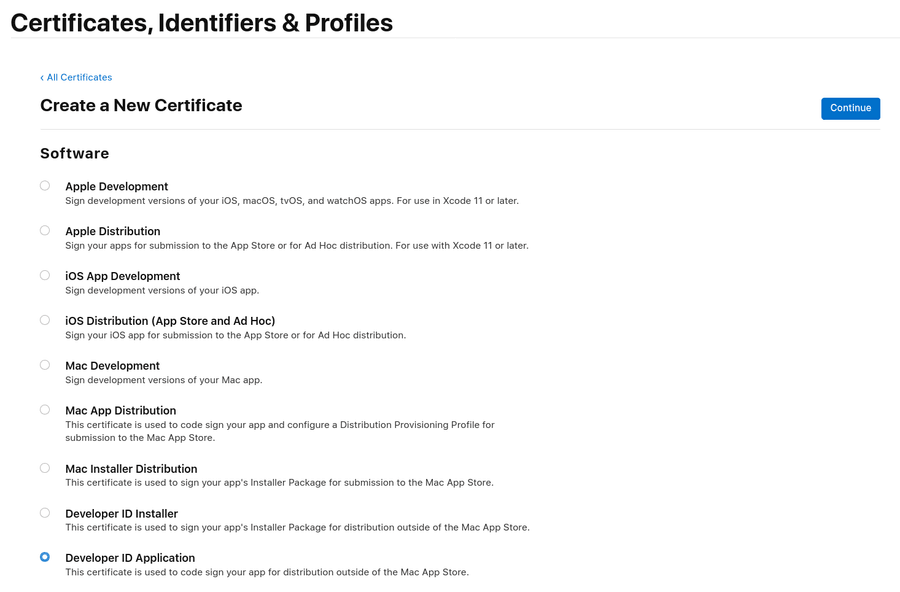
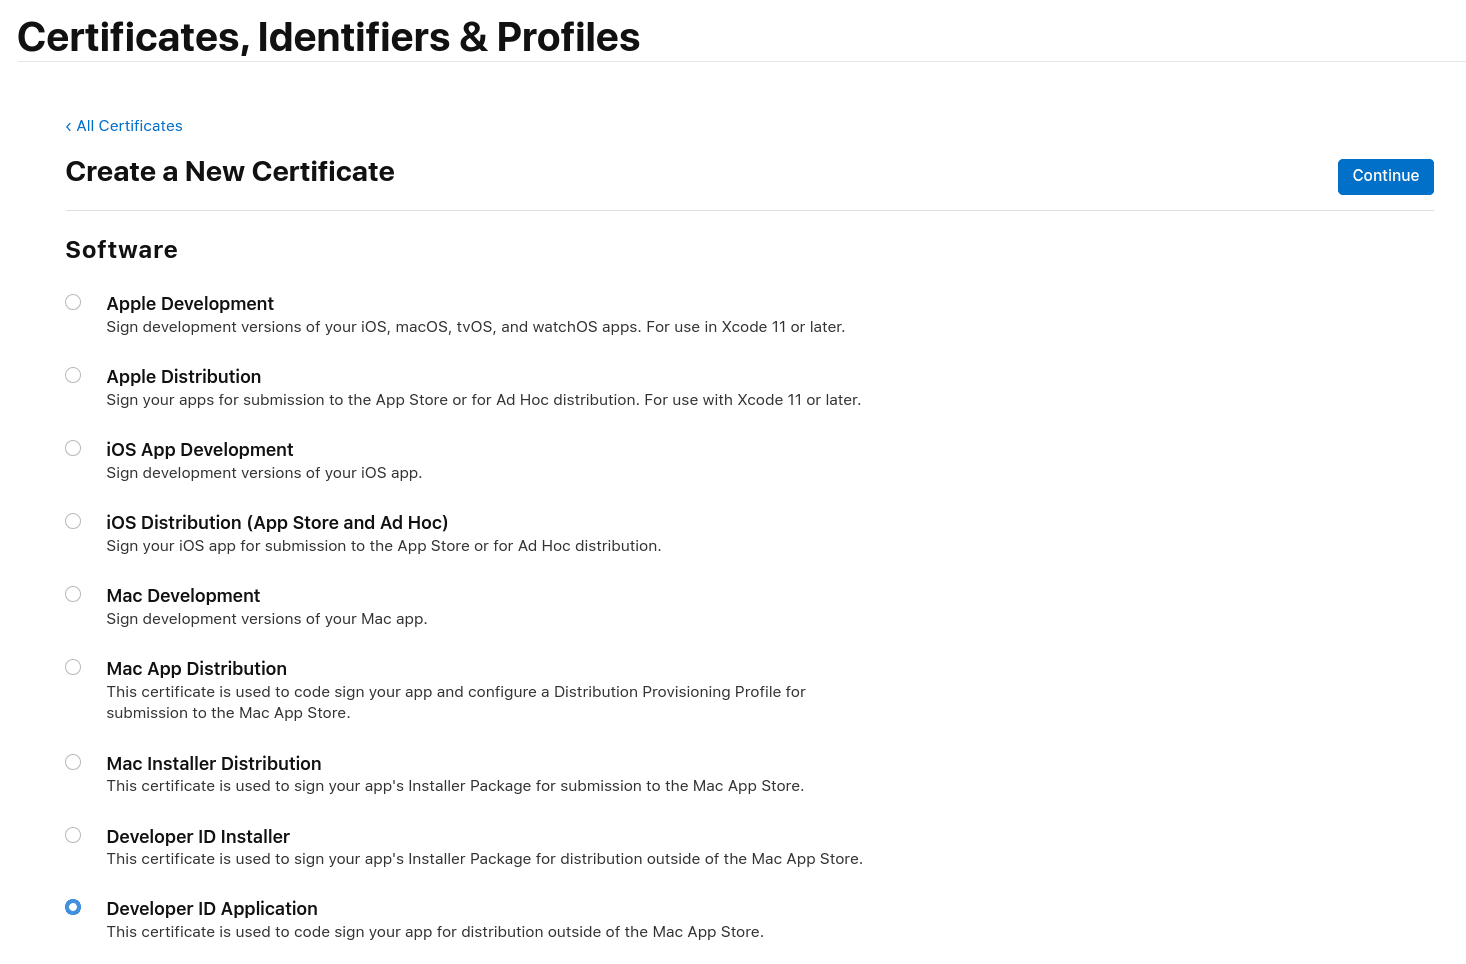
- Click the blue plus button to create a New Certificate, then select "Developer ID Application" and click Next.
- Follow Apple's documentation to generate the CSR file from your mac, ("Keychain Access" application, then top bar, "Keychain Access" -> "Certificate Assistant" -> "Request a Certificate from a Certificate Authority".
- Once you have your
.csr, upload it to the developer certificate webpage and click Continue. - Download the certificate now if you want, but we now need to make a "Developer ID Installer" certificate, following the same flow from Step 2.
- I re-used the CSR from the first step here.
- Once complete, download the certificate(s).
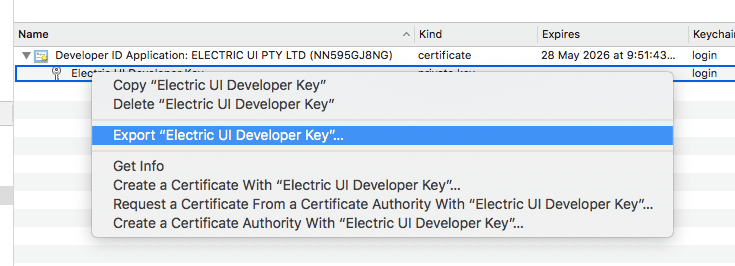
- From your mac's "Keychain Access" application, import the certificates into the
loginkeychain.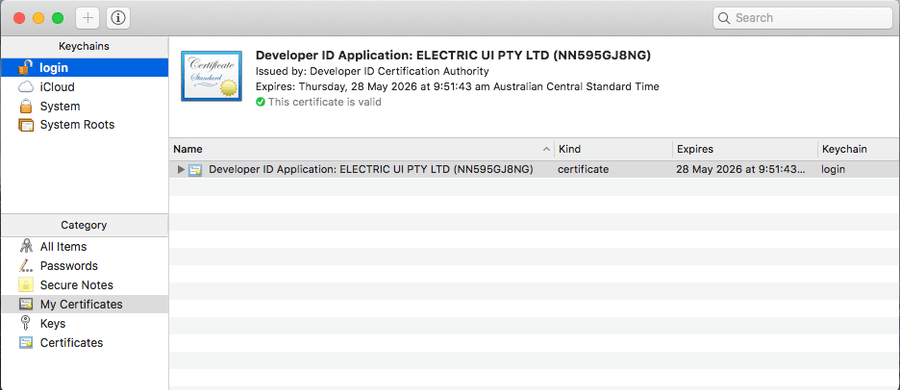
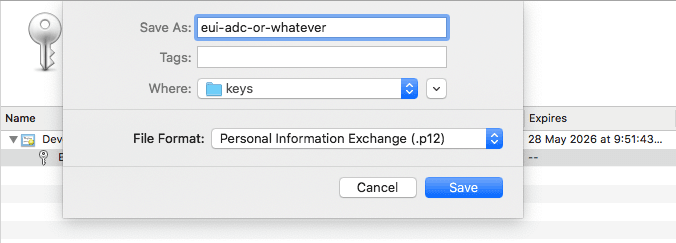
- Export the certificate in
.p12format, and provide a strong and unique password when prompted. -
- We now need to encode this file in a form that's accepted by the build tooling, and can be uploaded to the CI/CD service's secret/key management tool. We'll
base64encode it.- From the terminal or shell of your choice, use
base64and specify the input and output file paths.base64 -i dev_key_name.p12 -o dev_key_name_b64.txt
- From the terminal or shell of your choice, use
- From the Apple Developer account landing page, click "Certificates, Identifiers & Profiles"


With the base64 encoded key, the password to that exported key, and the Apple Developer account credentials, you have everything you need!
Project Setup
We need to configure some settings in the project's package.json to prepare the macOS builds.
"build": { // ... "dmg": { "sign": false }, "afterSign": "scripts/notarize.js", "mac": { "target": "dmg", "hardenedRuntime": true, "entitlements": "build/entitlements.mac.plist", "entitlementsInherit": "build/entitlements.mac.plist", "gatekeeperAssess": false }, // ...}Create a new file at project_folder/scripts/notarize.js and put the javascript configuration listed below into that new file. The appBundleId should match the appID field in the package.json file.
appleIdandappleIdPasswordare configured here to use the environment variablesAPPLE_IDandAPPLE_ID_PASSrespectively.This is intended to avoid hard-coding your Apple Developer credentials into the configuration file (and therefore leaking from your source control).
Later in the guide we'll show describe how to set these when building manually, or when using CI.
require('dotenv').config()const { notarize } = require('electron-notarize')exports.default = async function notarizing(context) { const { electronPlatformName, appOutDir } = context if (electronPlatformName !== 'darwin') { return } const appName = context.packager.appInfo.productFilename return await notarize({ appBundleId: 'com.electricui.awesomeapp', appPath: `${appOutDir}/${appName}.app`, appleId: process.env.APPLE_ID, appleIdPassword: process.env.APPLE_ID_PASS, })}In /build, create an entitlements.mac.plist file with the following configuration:
<?xml version="1.0" encoding="UTF-8"?><!DOCTYPE plist PUBLIC "-//Apple//DTD PLIST 1.0//EN" "http://www.apple.com/DTDs/PropertyList-1.0.dtd"><plist version="1.0"> <dict> <key>com.apple.security.cs.allow-jit</key> <true/> <key>com.apple.security.cs.allow-unsigned-executable-memory</key> <true/> <key>com.apple.security.cs.debugger</key> <true/> <key>com.apple.security.cs.disable-library-validation</key> <true/> </dict></plist>We're ready to go!
Why isn't this done for me automatically?
We'd love to, but it complicates things for most of our users who just want to test builds on macOS and aren't ready to setup their accounts and certificates.
Signing & Notarisation
Remember the environment variables we mentioned before for account details? We need to specify these as environment variables are ready when we run arc build, along with some additional variables for the certificate.
| Secret Name | Value |
|---|---|
| APPLE_ID | Email address for your Apple ID |
| APPLE_ID_PASS | The app-specific password you created for your Apple ID |
| CSC_LINK | The base64 encoded copy of the .p12 you exported earlier. |
| CSC_KEY_PASSWORD | The password you entered while exporting the .p12 |
Be careful to ensure the last character of the secret is the
base64data, and not whitespace or a new-line.
Manual Builds
The best way is to specify the variables in the scope of the command, rather than setting them more globally (to reduce leakage of passwords).
This is done by prefixing the arc build command with KEYNAME=value; as needed.
For example:
[email protected]; APPLE_ID_PASS=hunter2; CSC_KEY_PASS=trogdor1; CSC_LINK=thewholebase64text; arc buildIf you need to escape the strings, use single-quotes, for example: 'this is an escaped string'.
CI/CD Builds
As a generic guide: just add the environment variables we described in the manual build process to your CI's secret key/string management service.
Some services require you to specify keys as environment variables in your CI job or run configuration file(s).
As an example for GitHub Actions; the build job needs environment variables set from the secrets store, using ${{secrets.BLAH}} notation.
# Build end-user application binaries- name: Build template env: APPLE_ID: ${{ secrets.APPLE_ID }} APPLE_ID_PASS: ${{ secrets.APPLE_ID_PASS }} CSC_LINK: ${{ secrets.CSC_LINK }} CSC_KEY_PASSWORD: ${{ secrets.CSC_KEY_PASSWORD }} run: arc build