Arduino
Electric UI integrates with your Arduino projects and features a deep set of examples to get moving fast. Lets install the library and flash the hello-blink demo sketch!
Installing electricui-embedded
If you don't have the toolchain installed yet, grab it from the arduino.cc website.
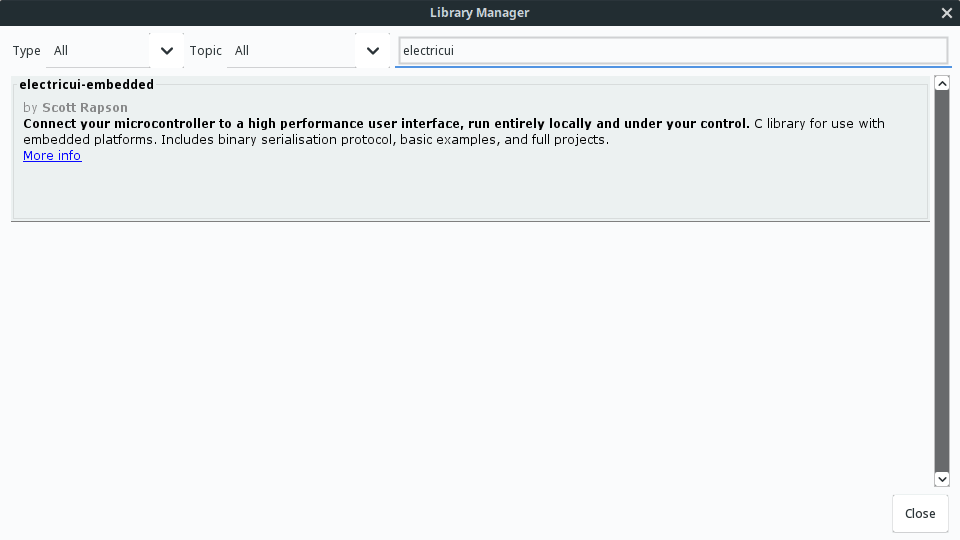
Library Manager
If you are using the Arduino IDE v1.6.2 or newer, use the library manager in Sketch -> Include Library -> Manage Libraries... and search for electricui-embedded.
Manual Install
If you are using a different IDE or toolchain, or don't want to use the managed library method, download the library from our GitHub.
Click "Download zip" on the GitHub page and move the folder into your libraries directory or suitable include path.
If you have git installed on your system, clone the repo directly
You may need to restart the Arduino IDE to find the new library and examples.
Getting started with serial communication
We'll assume that you've been able to flash at least one of the Arduino Blink example projects, and have managed to get serial communication printing to a console. If you haven't tested serial output yet, try the example here.
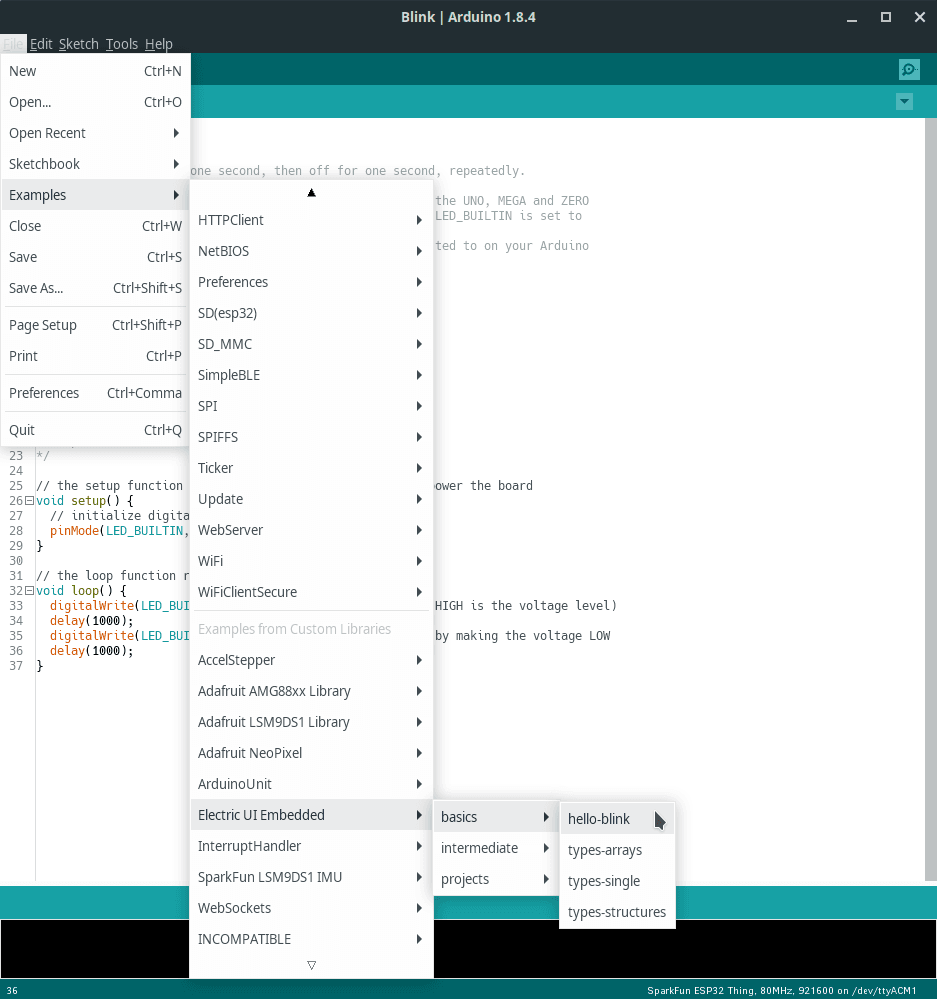
Open up the basic example under File -> Examples -> electricui-embedded -> Basic -> hello-blink.
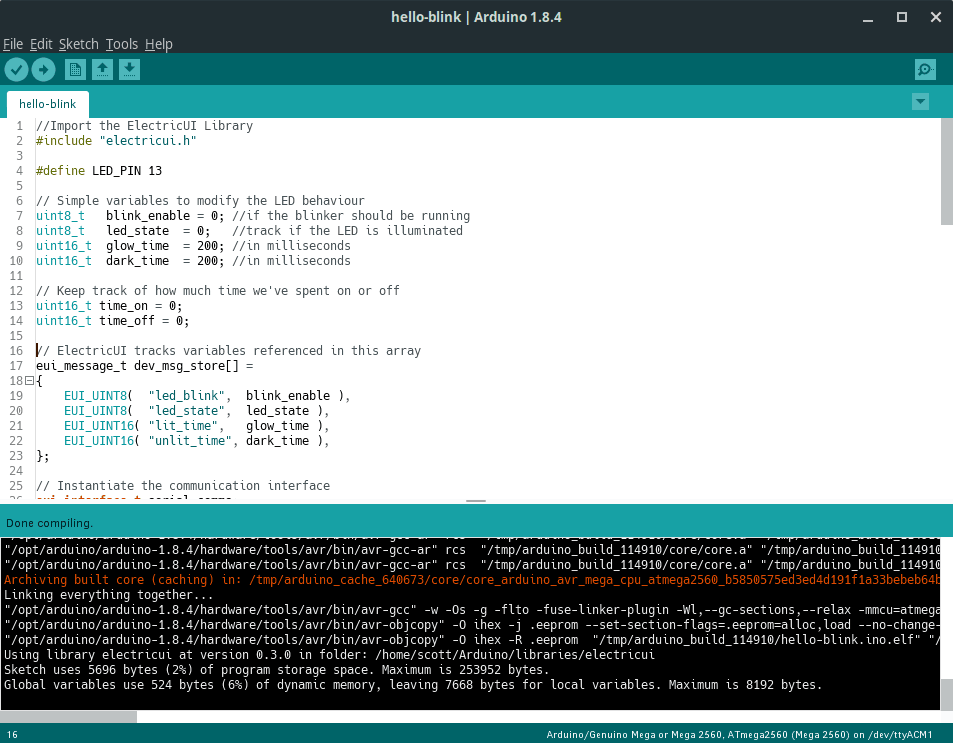
You should be able to compile the sketch for your microcontroller by pressing the Verify ✓ button in the top-left of the IDE.
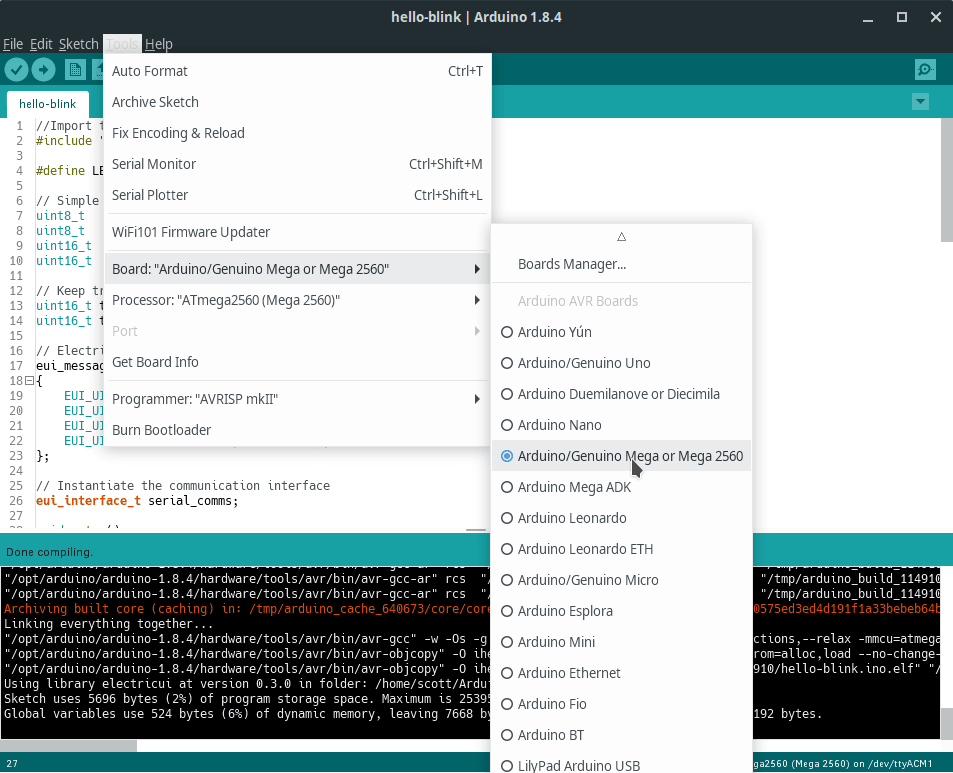
Ensure your board is selected in the hardware tab, and flash the sketch to your board.
The flashing process should complete, and after a restart the onboard LED will blink!
Now lets get a UI running with this firmware to test it out!
Troubleshooting
I can't see the Electric UI library in the Examples list
Try restarting the Arduino IDE if you copied the library into your libraries folder manually.
You should also see the library in Sketch -> Include Library -> electricui-embedded (under the Contributed Libraries divider).
Arduino Uno and Mega auto-reset on serial
Many traditional Arduino devboards like the Arduino Uno, Arduino Mega, and many derivative boards are designed to reset the microcontroller when a serial connection is opened to the hardware. This was intended to make program behaviour more understandable to beginners, but makes it harder for our event-based connection search and handshake process.
Ideally, this is disabled in hardware for the connection process to be able to function normally. We can work around this behaviour with software - by forcing the UI to wait after opening the serial port.
Edit the transport configuration file /hello-electric/src/transport-manager/config/serial.tsx to uncomment the attachmentDelay line near the bottom of the file:
configure: (hint: Hint) => { const identification = hint.getIdentification() const configuration = hint.getConfiguration() const options: SerialTransportOptions = { SerialPort, comPath: identification.comPath, baudRate: configuration.baudRate, // if you have an Arduino that resets on connection, uncomment this line to delay the connection attachmentDelay: 2500, } return options },Some boards will boot faster than others, so feel free to tweak the attachment delay to suit your hardware's behaviour.
Many boards with
16u2based USB-Serial converters may miss packets if serial data is sent too soon after the port is connected. This is discussed in the connection issues troubleshooting article.
My LED doesn't blink
If light doesn't blink, you should check if your board has a built-in LED (use the basic Arduino Blink sketch) and the pin number used is correct.
These examples use the LED_BUILTIN pin alias, which should map to your on-board LED for hardware with correct board definitions. You can overwrite this with a manual pin number by changing the setup function,pinMode( 13, OUTPUT ); and the LED write in the loop digitalWrite( 13, led_state );.
I don't see anything in the serial monitor
The Electric UI library isn't designed to work with normal human readable terminals, and won't write data unless a valid input packet requests a response.
You want to try a UI with the board instead!
Warnings about invalid serial objects
While we've used the standard Serial as the default, which is typically the main Arduino flashing interface like your USB cable, in rare cases your board might have different requirements.
Double check the Arduino bundled SerialPrint example works, or something like the SerialCallResponseASCII example. If these work, Electric UI should also work.
If the Arduino bundled examples don't work, you might want to check the documentation for your specific board. You may need to try a different hardware serial instance, like Serial1, or a SoftwareSerial. These conflicts affect the example sketches, but electricui-embedded doesn't interact with the Arduino libraries directly.