PlatformIO
Electric UI integrates easily with PlatformIO due to it's cross-platform design and pio's support of Arduino library metadata.
Lets install the library and flash a hello-blink demo program needed for the UI quickstart guide!
Project Setup
If you don't have PlatformIO tooling installed yet, download VSCode and install the PlatformIO IDE extension.
Common Troubleshooting Tip
Using Linux and get an error during install complaining about a missed
distutilspackage? You need to install thepython3-venvwith your package manager, and try re-installing the extension.
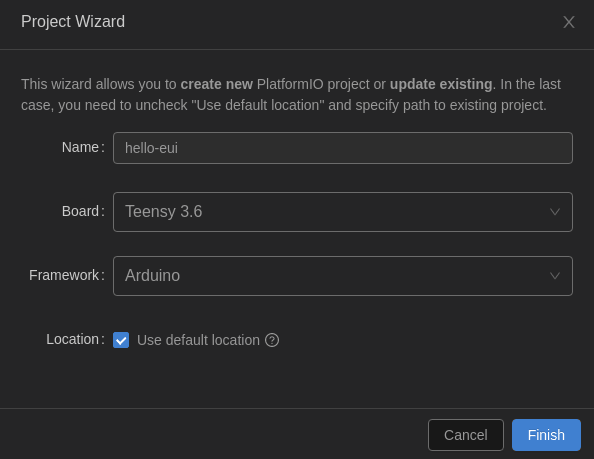
Create a new project for your microcontroller, we'll call ours hello-eui and select your board. We used a Teensy 3.6 for this demo.
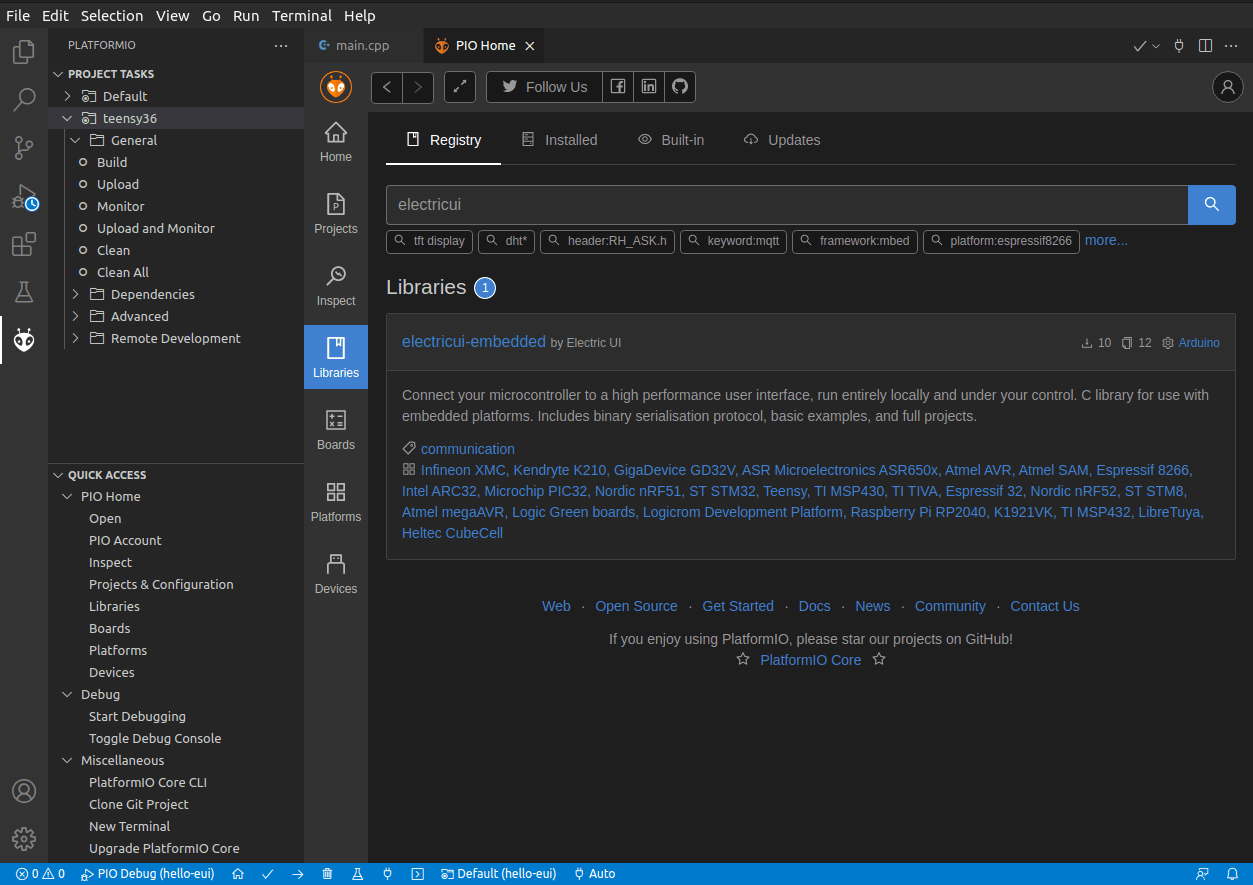
Once the project has been created and the main.cpp opens, lets install the electricui-embedded library.
From the PIO Home page, select the libraries page sidebar and search for "electricui".
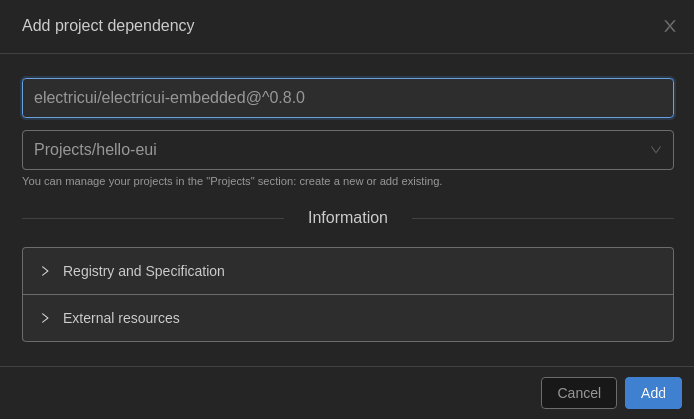
Click on it, click the blue "Add to Project" button, then click "Add" once the "Add project dependency" window opens.
You should see that the library has been added to the platformio.ini config file:
; PlatformIO Project Configuration File[env:teensy36]platform = teensyboard = teensy36framework = arduinolib_deps = electricui/electricui-embedded@^0.8.0Now we can create a simple UI-controlled LED blink example.
Hello Blink
The snippet below is a copy of the Arduino example hello-blink example, but we also import the Arduino.h header.
Because PlatformIO has slightly stricter compiler settings by default, we also need to declare some functions serial_rx_hander() and serial_write() which we'll use later.
We'll also declare some variables to let us control our blinking led.
#include <Arduino.h>#include <electricui.h>void serial_rx_handler();void serial_write( uint8_t *data, uint16_t len );// Simple variables to modify the LED behaviouruint8_t blink_enable = 1; // if the blinker should be runninguint8_t led_state = 0; // track if the LED is illuminateduint16_t glow_time = 200; // in millisecondsuint32_t led_timer = 0; // track when the light turned on or offNow lets configure the electricui-embedded integration. Tracking variables allows the library to automatically handle sending/receiving packets with the UI behind the scenes.
The interface is given a pointer to our serial_write() function, this allows the library to output data by calling this function.
// Instantiate the communication interface's management objecteui_interface_t serial_comms = EUI_INTERFACE( &serial_write ); // Electric UI manages variables referenced in this arrayeui_message_t tracked_variables[] = { EUI_UINT8( "led_blink", blink_enable ), EUI_UINT8( "led_state", led_state ), EUI_UINT16( "lit_time", glow_time ),};In the Arduino setup() function, setup the serial port and LED GPIO, and then tell the electricui-embedded library about the interface and tracked variable list we declared.
void setup(){ // Setup the serial port and status LED Serial.begin( 115200 ); pinMode( LED_BUILTIN, OUTPUT ); // Provide the library with the interface we just setup eui_setup_interface( &serial_comms ); // Provide the tracked variables to the library EUI_TRACK( tracked_variables ); // Provide a identifier to make this board easy to find in the UI eui_setup_identifier( "hello", 5 ); led_timer = millis();}In our loop(), we'll first check for any new inbound serial data, then run a little (non-blocking) check if we should change the LED's state.
void loop() { serial_rx_handler(); //check for new inbound data if( blink_enable ) { // Check if the LED has been on for the configured duration if( millis() - led_timer >= glow_time ) { led_state = !led_state; //invert led state led_timer = millis(); } } digitalWrite( LED_BUILTIN, led_state ); //update the LED to match the intended state}void serial_rx_handler(){ // While we have data, we will pass those bytes to the ElectricUI parser while( Serial.available() > 0 ) { eui_parse( Serial.read(), &serial_comms ); // Ingest a byte }}Finally, we'll finish up by completing the serial_write() callback function we declared and provided to eUI during setup. The callback is provided with a buffer of bytes and a length, so output with the Arduino Serial.write() makes output really easy.
void serial_write( uint8_t *data, uint16_t len ){ Serial.write( data, len );}Building and Flashing
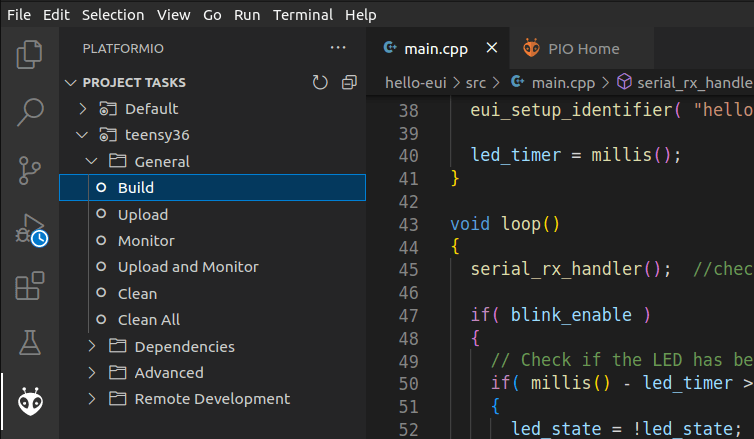
Select the PlatformIO icon on the left-most navigation bar, and then select "Build". It should build without issues. Then click upload to flash it to the microcontroller.
We don't want to "Upload and Monitor" as the serial port needs to be available for the user-interface.
Once rebooted, the microcontroller should be blinking the onboard LED!
Now lets connect a UI to this firmware to test it out!
Troubleshooting
Linux connections permissions
You probably need to install the udev rules as described by this PlatformIO doc.
As mentioned on the same docs page, you might need to add your user to the relevant group for serial port access, sudo usermod -a -G dialout $USER:
- Ubuntu/Debian distributions use either
dialoutorplugdev - Arch based distros use the
uucpgroup.
Adding udev rules or adding your user to new groups will require you to log out and back in, and likely needs hardware to be reconnected for new permissions to apply.